Create New Blog Post
Creating and managing blog posts is an integral part of maintaining an engaging and informative website. This guide will walk you through the process of creating new blog posts in your CRM, detailing each step from start to finish. Additionally, we will cover frequently asked questions and provide troubleshooting tips to ensure a smooth experience.
Creating a New Blog Post
Navigate to the Sites Section: Start by accessing the Sites section of your CRM.
Access the Blogs Section: Click on the Blogs tab at the top of the page.
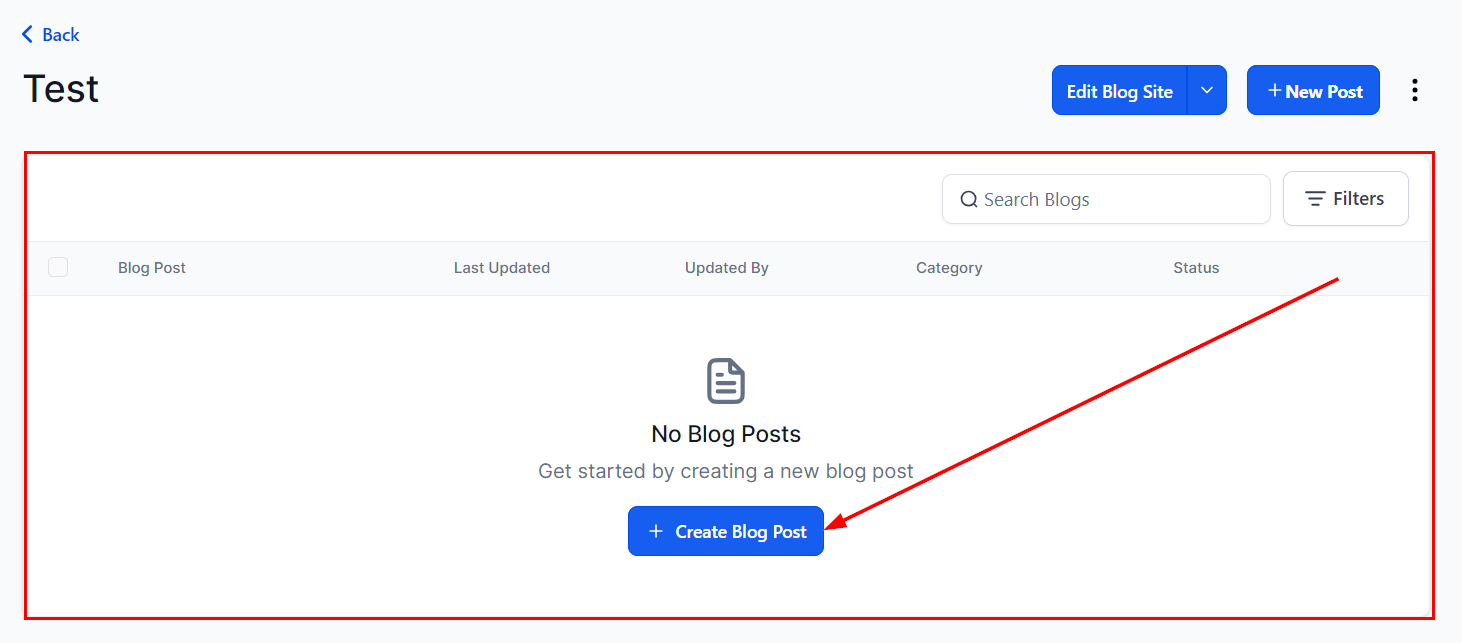
Add a New Post: Click on the "+ New Post" button to begin creating a new blog post.

Pop-up Form Details
Once you click on "+ New Post," a pop-up form will appear. Complete the following fields:
Blog Site Title: Enter the title for the page that will host your blogs.
Domain & Slug: Select the appropriate domain from the dropdown menu and enter a memorable slug. A preview of the blog link will be displayed.
Blog Meta Description: Provide a summary of the blog's focus.

After completing these fields, click the “Create” button followed by "+ Create Blog Post" to proceed.
Title: Type in the title for your blog post here.
Cover Image: You can upload the cover page for your blog here by clicking on the Change button, which directs you to the Media section where you can upload the image you want to use or select an existing image. Once you have identified the image, double-click on the image, which will automatically add the image. To change/replace the image, click on the Change button, and if you want to delete the image uploaded, just click on Remove. The recommended size is 600px * 400px, and the Supported image size is 10MB.
Alt Text (Cover image): Add your Alt Text for your cover image here. By including alt text, you make your website more accessible and improve its SEO.
Post Description: Give a brief description of the post for readers to preview. The description length should be between 100 - 250 characters.
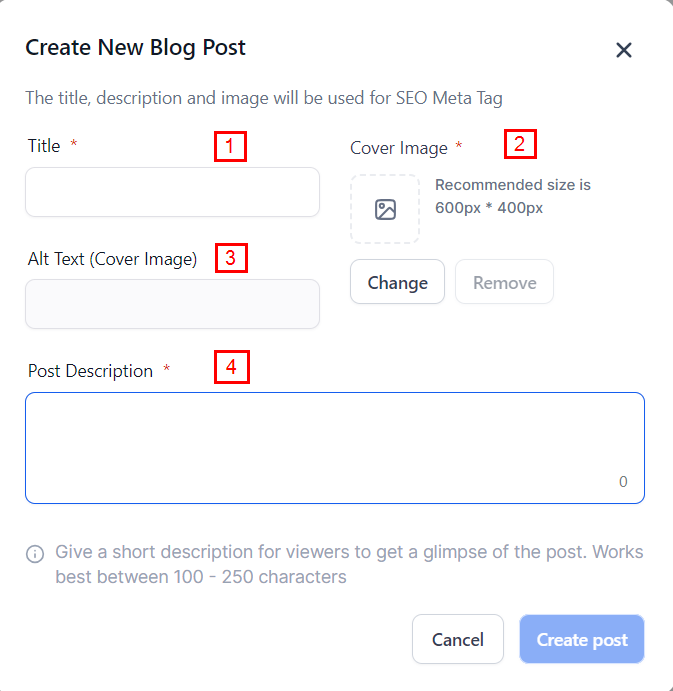
Select the Create Post button when you have completed the steps above.
Adding Content to Your Blog Post
On the next page, you will see a sample blog post for reference. You can edit this sample or start from scratch.
Content Editing Features:
Undo/Redo: Easily reverse or reapply changes.
Text Formatting: Use bold, italics, underline, strikethrough, font styles, and size options.
Spacing and Alignment: Adjust left, center, right, justified, indent, or outdent spacing.
Lists: Add numbered lists, bulleted lists, or to-do lists.
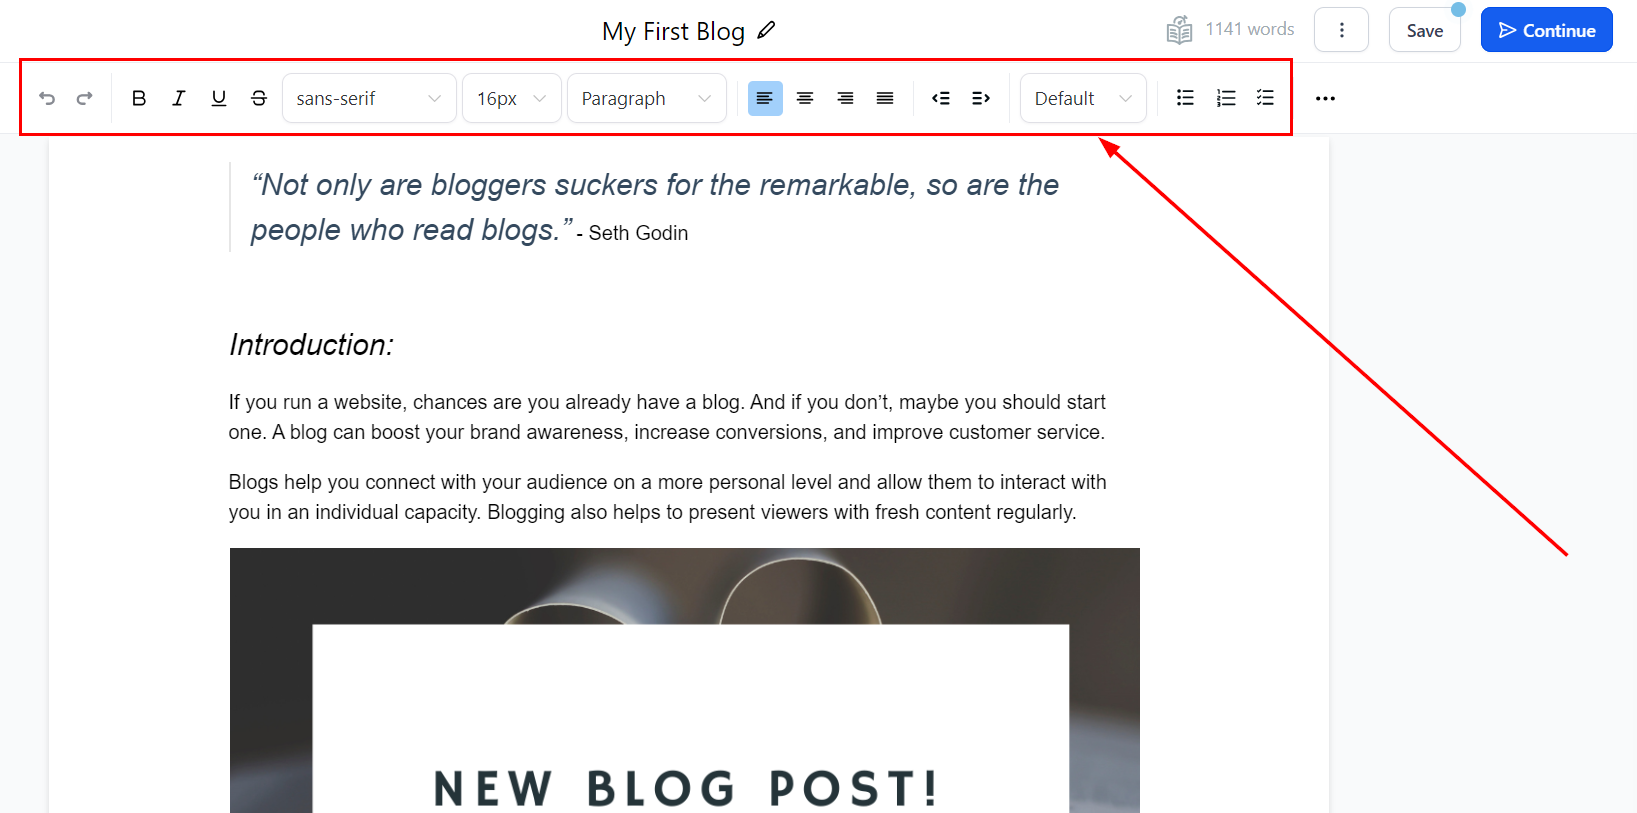
Text and Background Color: Highlight text and background.
Media Insertion: Insert hyperlinks, images, audio, or video from the Media Library or YouTube.
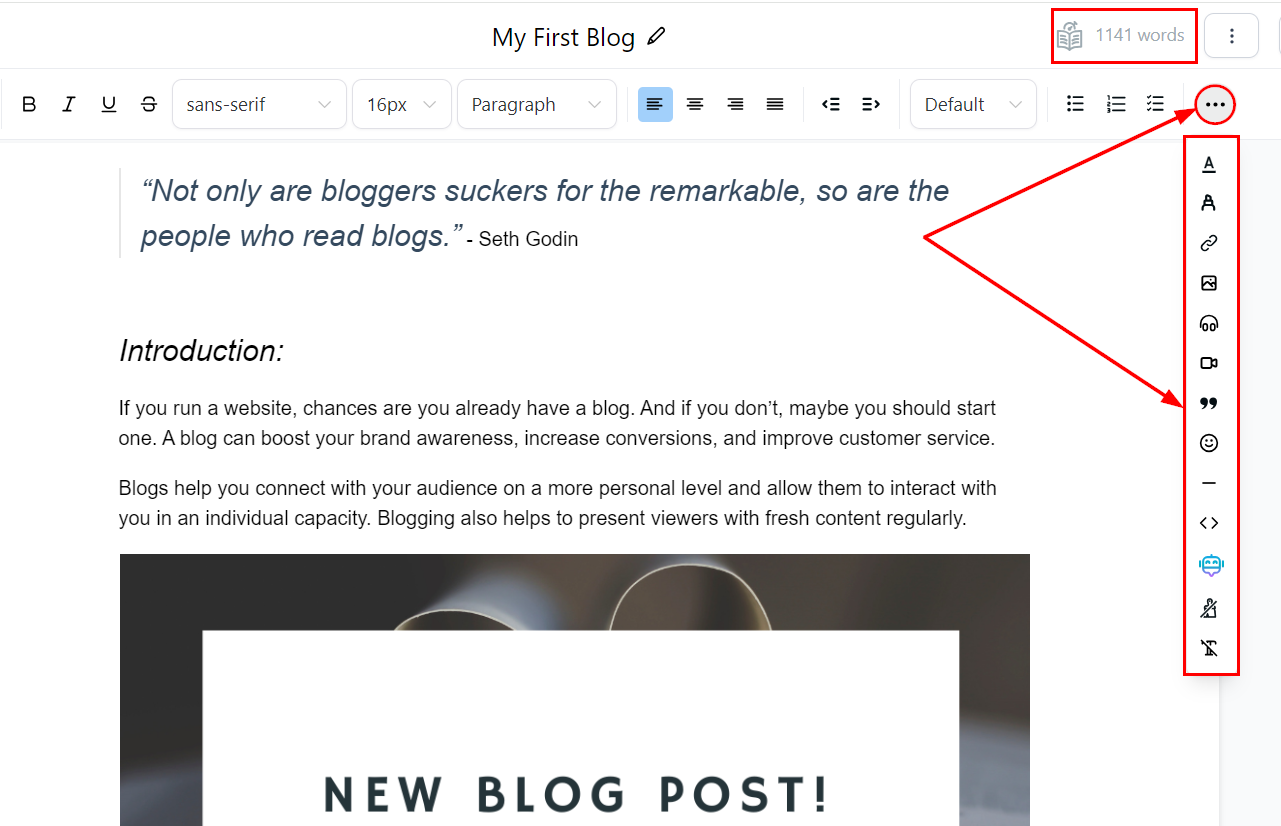
Additional Elements: Include quotes, emojis, dividers, and custom code.
Content AI: Utilize AI to craft an engaging outline, introduction, and sections.
Format Clearing: Clear the format of a specific section or the entire blog.
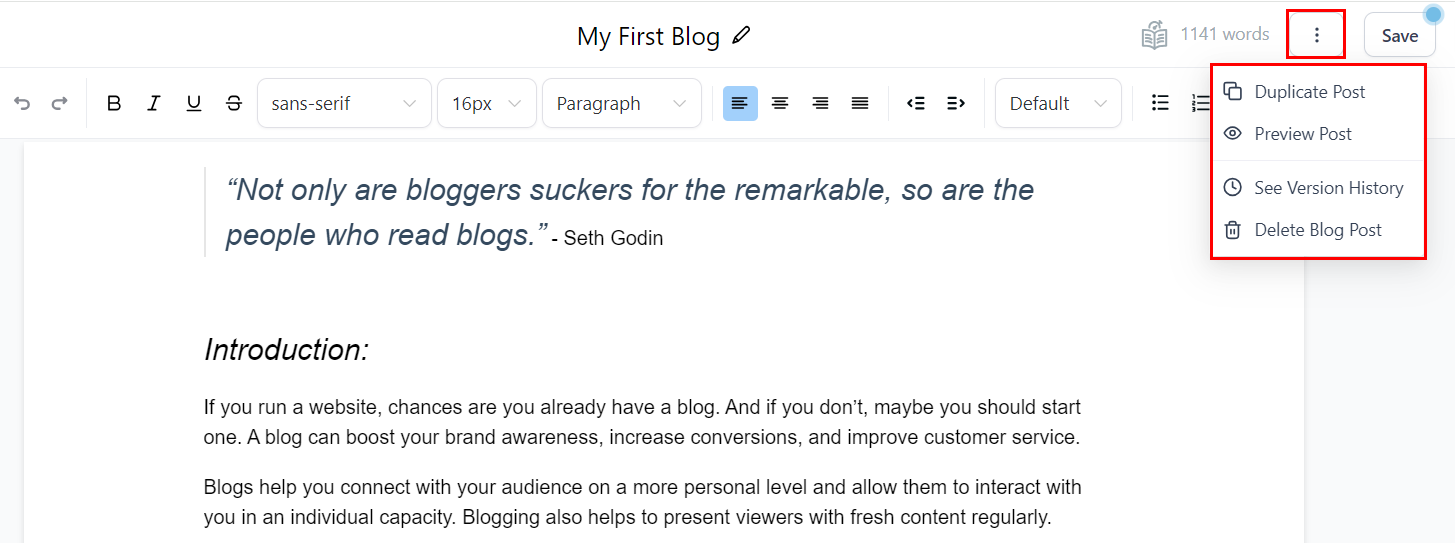
Action Menu Options
Duplicate Post: Click this button to duplicate the blog post.
Preview Post: Preview your post by clicking this button. Save your article before previewing.
See Version History: View previously saved versions of your article.
Delete Blog Post: Permanently remove the article by clicking the Delete button.
Frequently Asked Questions
Q: Can I schedule blog posts for future publication?
Yes, you can schedule posts to be published at a later date by setting the desired publish date and time in the post settings.
Q: How do I optimize my blog posts for SEO?
Use relevant keywords in the title, meta description, and throughout the content. Add alt text for images and ensure your blog post is well-structured with headers and sub-headers.
Troubleshooting Tips
Formatting Issues: If you encounter formatting problems, use the format clearing option to reset specific sections or the entire blog.
Image Upload Errors: Ensure your images meet the recommended size (600px x 400px) and supported file size (up to 10MB).
Preview Discrepancies: If the preview does not reflect recent changes, save the article again and refresh the preview.
Last updated